
Developing an ideal video script will require time, and in some cases, you will find that reading through the script will not give you a true idea of how it will come out in the final product. The AI Voice Generator at CapCut comes into the picture. It also allows content creators, marketers, and educators to experiment and adjust scripts before committing to full video production due to its advanced voice synthesis and real-time playback features.
Here, we will go over five elementary steps of operation with the CapCut Desktop Video Editor, outline its main features, and see how tools such as Text-to-Speech AI and AI Video Upscaler can help you become even more efficient.
Why Test Your Video Scripts in Real Time?
Your video scripts are best tested in real time so that you can isolate any awkward phrasing, develop an emotional tone of voice, and make your message easily understood and interesting. When you can audition your script with natural AI voice over, you can edit it quickly and make better creative judgments. CapCut can make it fast, cheap, and extremely simple.
Benefits of Using CapCut for Script Testing
CapCut is faster, accurate, and convenient in script testing; thus, it is advisable for both amateurs and professionals. That is why creators appreciate its ease of use when it comes to scripting a video in real-time:
No Need for Microphones
Test your script using AI voiceovers with the change of a button, no need to install a microphone, struggle with that background noise, and re-record every ring of a change. This makes your pre-production facile and reduces your gear expenses.
More Creative Freedom
CapCut includes a wide range of voice profiles, from active and passionate to soothing and professional. This will give you a chance to try various tones, paces, and styles of delivering to see which one best suits you to convey your message. You may even be able to run the same script under various voices to find out which of them sounds most appealing to the preferences of your target audience.
Saves Time
Among the greatest benefits of the AI Voice Generator of CapCut, the possibility of feedback in real-time is included. No need to wait until a complete render is ready or to record a voiceover with an external microphone: you simply type your text and hear the voiceover, adjusting, instantly, to the pace, word choice, or tone. This feed rate of feedback significantly reduces the time of production time.
Audio + Visual Editing in one place
In comparison to other platforms that one has to alternating use of voice tools and video editors, CapCut has integrated all the necessary resources in a user-friendly workstation. You will be able to place your visuals, coordinate your voiceover, and to perform a cohesive video devoid of going to and fro between different applications. This end-to-end solution reduces the number of times the workflow is interrupted and increases productivity.
Step-by-Step Guide: Real-Time Script Testing in CapCut
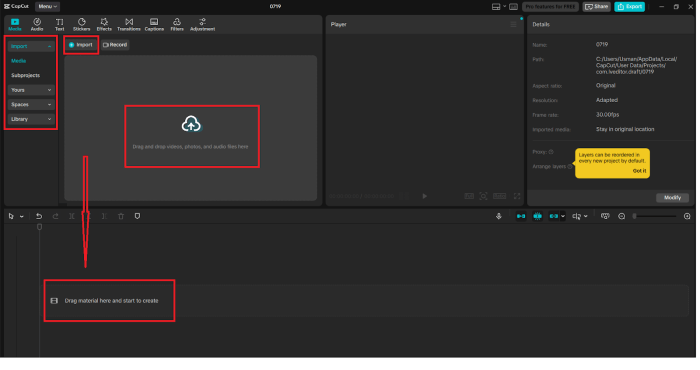
Step 1: Import Your Script and Media
Install and open CapCut Desktop, then go to “Create project”. On the top left-hand side, click on the additional symbol provided with the label of “Media” to import your visual assets (video clips, stock footage, or background images). You can begin with a script by importing background pictures first to give you a picture of how you are going to lay out your scene.
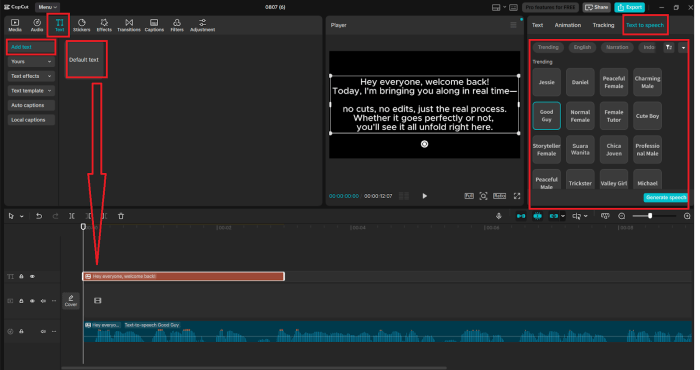
Step 2: Use the AI Voice Generator Tool
Go to the top menu and select the “Text” tab and then select “Text to speech” in the drop-down. Copy your video script to the given box. Choose from an extensive collection of voice samples, male, female, formal, energetic, calm, and others. Use the pace and tone depending on how you feel about a video.
This is where the AI Voice Generator thrives, to simply see the immediate previews of your script and get a preview of how your script sounds in a second without having to record anything.
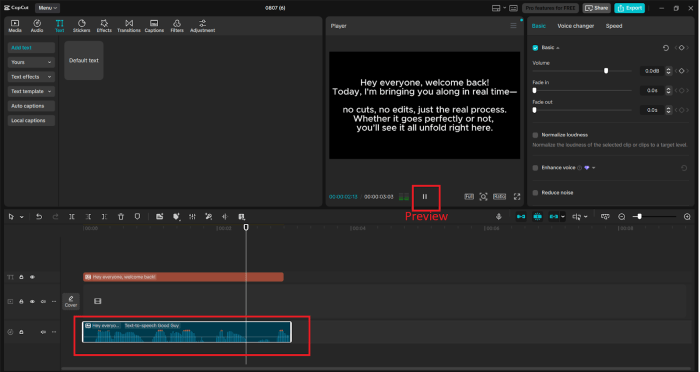
Step 3: Test and Refine Your Script
To listen to the AI-generated voiceover, simply click the “Preview Voice”. When it is too robotic or fast, replay and make adjustments to the script. Perhaps try to make longer sentences shorter or mix phrases to explain them better. You are able to do real-time testing without exporting, every time-time savings of hours in production.
It is further facilitated with the help of CapCut Text to speech AI that helps to reach a global and varied audience by offering an opportunity to choose an adequate number of languages and expressive styles.
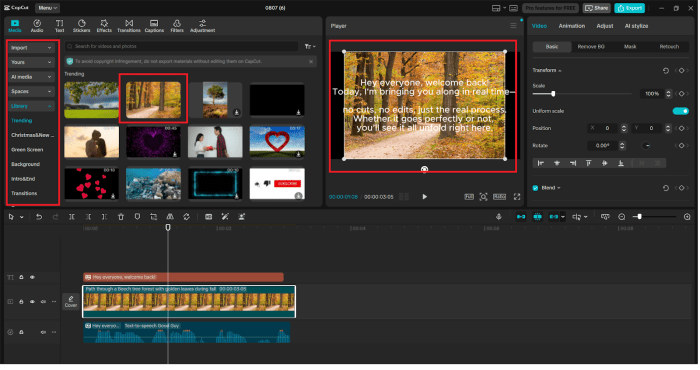
Step 4: Add Visuals and Sync Voiceover
After your voiceover is complete, you drag it into the timeline. After that, match up your visual clips or your still images with the narration. CapCut’s simple timeline ensures that it is easy to trim and put content in the right place. Add necessary on-screen text, effects, or animations to enhance the viewer’s experience.
Also, note the “Audio” tab to supply background music or background ambiance as required by the narration.
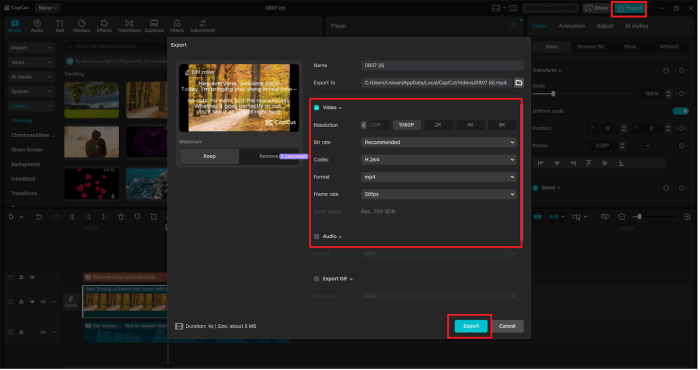
Step 5: Export Your Final Preview
When it all appears and sounds as you want it to, hit “Export” in the upper-right-hand corner. Select the resolution of your choice- that may be HD or even 4K in case you require that. You are able to export a preview to review by the team or even use the version as your final video.
Feel you want to improve your appearance? Before exporting, apply the AI Video Upscaler to CapCut to accentuate any shot of low resolution and to improve the overall performance.
Final Thoughts
With the AI Voice Generator, CapCut made it easier to test the script before production. Regardless of whether you create explainer videos, YouTube videos, or promotional videos, having high-quality AI voice over your script read out loud will give you a competitive advantage.
CapCut can help you turn your script into a movie- state-of-the-art editing tools such as Text to Speech AI, intuitive editing capabilities, and features such as the AI Video Upscaler allow you to make your ideas come to life more efficiently and effectively.