
Editing videos can feel very hard when you want to follow moving objects. Maybe you want a name tag to stay on a person who is walking fast. Keeping things in place while the camera moves is often a big struggle. This is where motion tracking becomes a very helpful tool for your work.
It helps you link text or pictures to things that move in clips. Here, Filmora makes this process very easy for people who are just starting out. It makes videos look professional and interesting quickly. This guide shows you how to use this advanced tool without stress.
Part 1. Motion Tracking in Filmora: A Simple Way to Track Objects in Videos
Capturing the attention of your viewers often requires adding dynamic and moving elements. Wondershare Filmora is a great tool that helps you manage these moving parts. This AI motion tracking tool applies magical effects like shields that follow hands or moving objects. You can track multiple objects simultaneously for professional-quality editing projects. Filmora analyzes video objects automatically and generates accurate motion paths efficiently.
Editors can place text tags or notes on landmarks that follow camera motion. A motion-tracked VFX stays locked to a selected object, like a basketball or a player, during action. Users can draw and resize boxes around objects for precise AI motion tracking. This video editor for PC allows previewing tracked motion in the Player window for real-time adjustments. Moreover, Filmora automatically generates smooth motion paths after selecting the tracked object.
Key Features
- Attach Mosaics: Apply mosaic effects on moving objects without manually adjusting each frame.
- Minimal Keyframes: Motion tracking reduces manual keyframing, saving editors significant time.
- Scale Adjustment: Resize the motion tracking box to match the object’s size for more accurate tracking.
Why Filmora is Beginner-Friendly
A beginner editor may want motion tracking but feel confused by complex video tools. Below are simple reasons showing why Filmora feels easy for new editors:
- Visual Indicator: A colored bar appears above the clip to show tracked parts clearly. This simple mark helps beginners understand where tracking begins and ends.
- Easy Adjustment: Users can change follower size or position without repeating the tracking process. This saves time and helps beginners fix small mistakes quickly during editing.
- Simple Interface: Filmora uses clear buttons and a clean timeline that beginners understand. The design avoids complicated panels and keeps editing steps short and simple.
- Quick Linking: After tracking finishes, users choose an element from the link option menu. Text, stickers, or blur effects attach easily and move together with tracked objects.
- AI Assistance: It uses AI tools that follow movement without manual keyframe adjustments. Editors simply click Start Tracking, and the program analyzes motion frame by frame.
Part 2. Desktop Motion Tracking Workflow in Filmora for Beginners-Guide
Editing moving objects becomes easier when you follow a clear and simple workflow. Filmora provides an auto motion tracker for objects that helps beginners follow movement. The steps below explain how to use this feature on a desktop for smooth results:
Step 1. Import a Video to Apply Motion Tracking
Open the main interface and click the “New Project” option to start editing. On the next screen, select the “Import” button to add your video file.
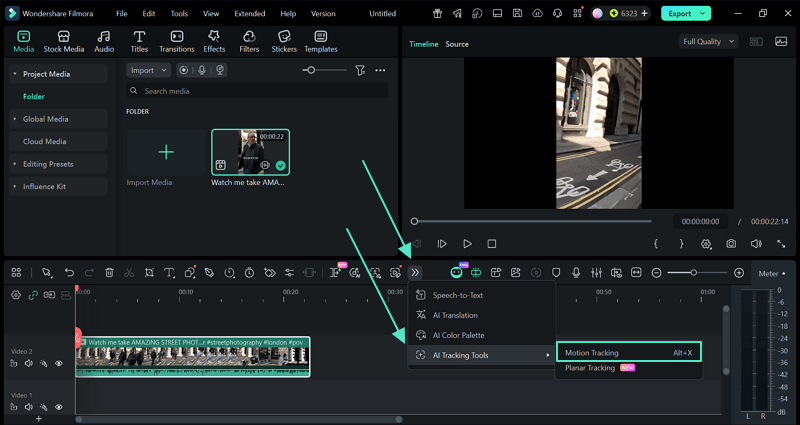
Step 2. Access the Motion Tracking Feature
Next, drag and drop your video onto the timeline and click the “Forward Arrow” icon above the timeline toolbar. From the menu, open “AI Tracking Tools” and choose the “Motion Tracking” option to continue.
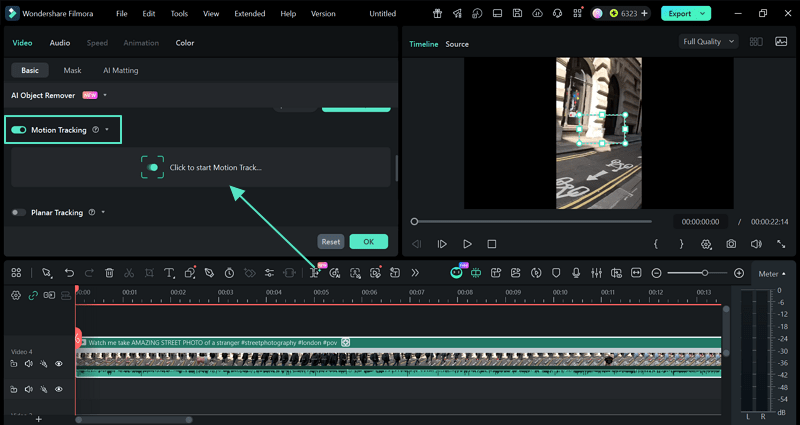
Step 3. Apply Track Motion to the Video
After opening the feature, select the object you want to follow in the clip. Turn on the “Motion Tracking” option and press “Click to Start Motion Tracking”. Filmora will follow the object automatically across the video frames.
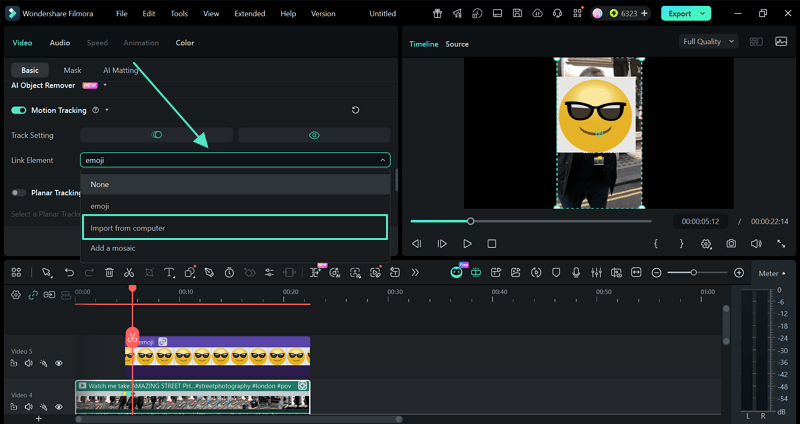
Step 4. Link an Element
After tracking begins, click the “Link Element” option in the settings panel. Choose the element you want to attach by clicking “Import from Computer.” This is entirely on the discretion of the user if they wish to make any changes to the tracked object.
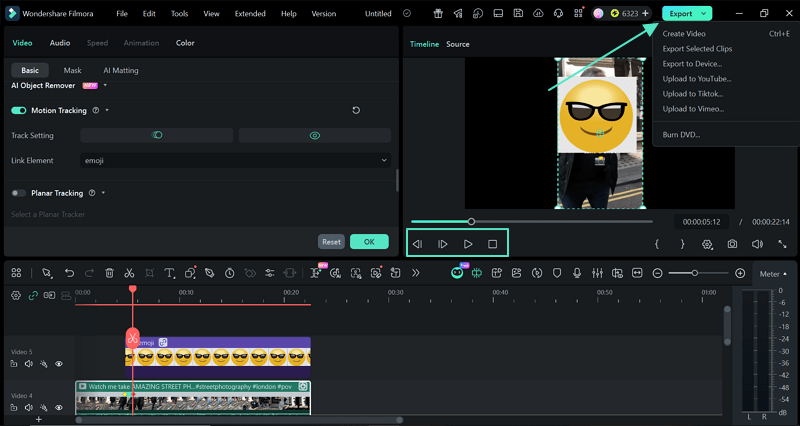
Step 5. Preview and Export the Final Video
Once tracking is complete, preview the video to check that everything moves correctly. Then click the “Export” button to save the video to your device or share it.
Part 3. Movement Tracking Effects You Can Create with Filmora App
Creative videos often need effects that follow objects to make scenes more engaging. This is where movement tracking helps attach text, graphics, or blur to moving elements. Review the guide for creative effects you can easily create using the Filmora app:
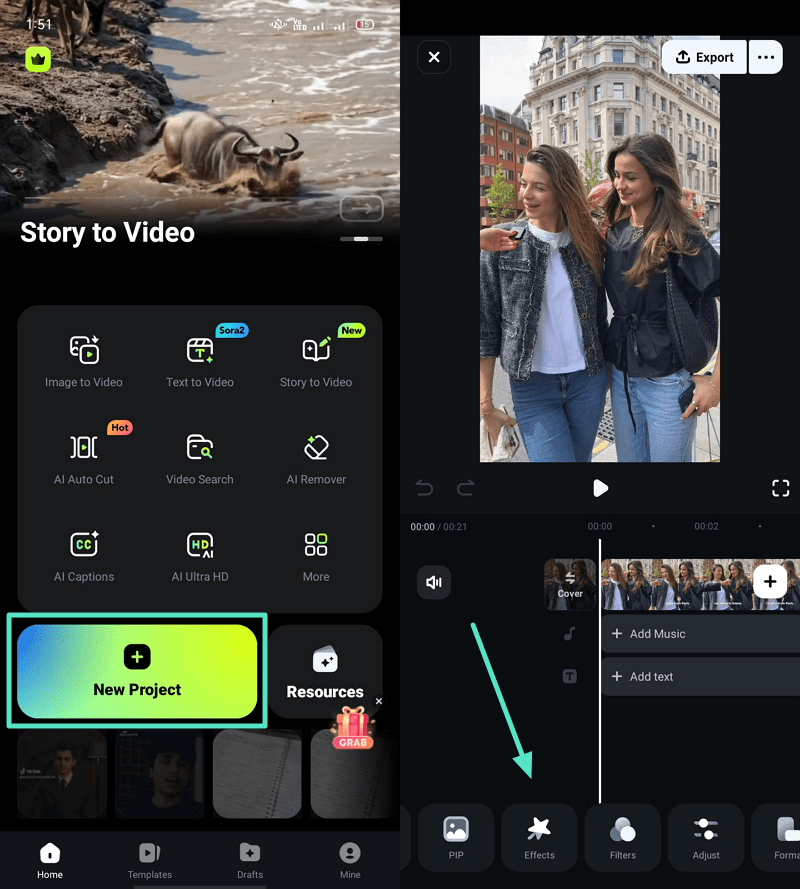
Step 1. Add a Video to the App
To initiate, tap the “New Project” from the main screen and import a video, then press the “Effects” option.
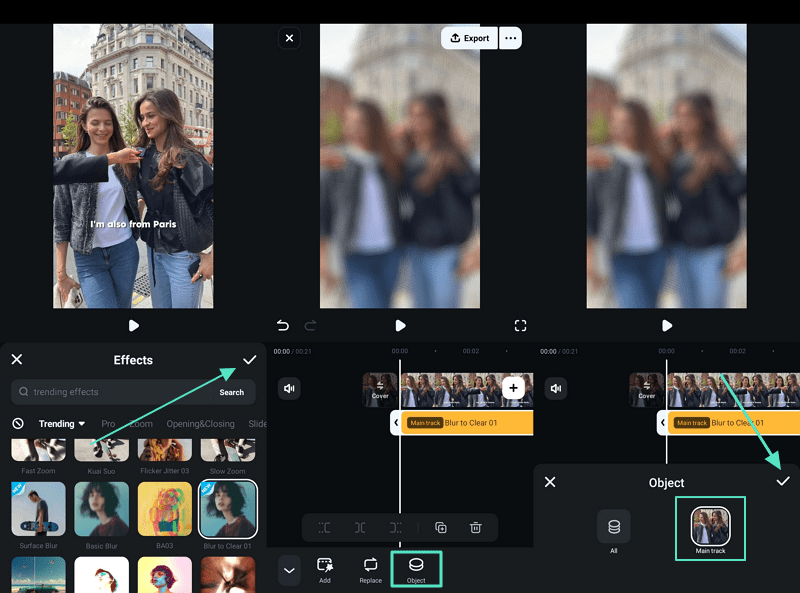
Step 2. Apply Effect and Select Object
After that, select the preferred effect and tap the “Tick” icon, then press “Object” to opt for an object. Next, select the “Main track” option and choose the “Tick” icon to move forward.
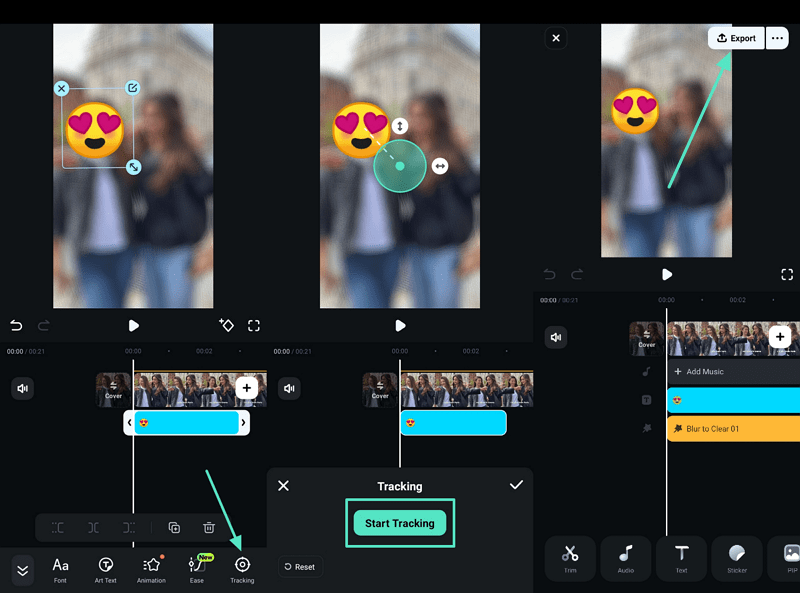
Step 3. Start Motion Tracking and Export Video
Now, add anything like an emoji to the object and tap the “Tracking” option and opt for the “Start Tracking” button. Once it starts tracking, select the “Export” option above to save it to the device.
Part 4. Motion Tracking Tips for Better Results in Filmora
Sometimes editors notice tracking errors when objects move fast or disappear briefly. Good video motion tracking needs clear clips, stable objects, and correct tracking box placement. Go through the practical tips below to improve tracking accuracy and create smoother results:
- Clear Contrast: Choose clips where the object stands out clearly from the background with visible edges. Good contrast helps Filmora detect shapes easily and follow object movement across frames.
- Short Clips: Trim long footage so the tracked object stays visible during the entire tracking section. Short clips help the tracker follow motion better without losing the object suddenly.
- Smooth Motion: Record scenes with smoother movement because sudden, fast motion creates blur and confusion. Higher frame rates help capture cleaner frames, improving tracking accuracy during fast actions.
- Right Size: Draw the tracking box tightly around a stable object area, like a logo or a face. Avoid covering the whole frame because the tracker may follow unwanted background movement.
- Element Alignment: After tracking, link text, blur, or stickers using the Link Element option. Adjust element position slightly so graphics stay centred and follow motion naturally.
Conclusion
In conclusion, using motion tracking is a wonderful way to bring your creative ideas to life. Adding moving text or fun effects helps you keep your audience very happy. Modern viewers always want to see high-quality and unique styles in clips. Therefore, tools like Filmora make these tasks very simple and allow you to start editing like a pro.